

Intake Carburetor Carb Joint Boot Insulator OEM Yamaha Banshee YFZ350 YFZ 350
Upgrade or replace your worn-out intake system with this high-quality OEM Intake Carburetor Carb Joint Boot Insulator specifically designed for the Yamaha Banshee YFZ350. Crafted to factory specifications, this durable rubber insulator ensures a tight, leak-free seal between the carburetor and engine for consistent air-fuel mixture and improved throttle response. Whether you’re rebuilding your Banshee or tuning for better performance, this intake boot provides the perfect OEM fit and finish you can rely on.
Key Features:
-
Genuine OEM fitment for Yamaha Banshee YFZ 350
-
Ensures proper airflow and fuel delivery to the engine
-
Durable rubber material resists cracking and heat
-
Easy installation—no modifications required
-
Ideal for performance upgrades or stock replacements
Compatible with all Yamaha Banshee YFZ350 model years, this intake joint boot insulator keeps your two-stroke beast running smoothly and efficiently. Ride harder, longer, and worry-free with the reliability of OEM parts.
✅ Uses
The Intake Carburetor Joint Boot Insulator plays a critical role in the Yamaha Banshee YFZ350’s intake system. It connects the carburetor to the engine intake port, ensuring proper air-fuel mixture delivery while preventing leaks or air disruptions. Common uses include:
-
Sealing the intake path between the carburetor and engine
-
Maintaining air-fuel mixture integrity
-
Absorbing vibrations between engine and carburetor
-
Reducing wear on intake system components
-
Replacing worn or cracked boots during engine rebuilds or performance tuning
✅ Properties
-
Material: High-grade heat-resistant rubber or rubber-composite material
-
OEM Fitment: Designed to match factory specs for Yamaha Banshee YFZ350
-
Durability: Resists cracking, shrinking, or hardening from heat and fuel exposure
-
Flexibility: Maintains tight seal while absorbing vibration and movement
-
Precision Molded: Ensures smooth internal airflow with zero turbulence
✅ Manufacturing Process
-
Material Selection:
The process begins with selecting a specialized rubber compound known for its resistance to fuel, heat, and vibration. OEM-grade rubber is chosen to meet or exceed Yamaha’s specifications. -
Molding:
The rubber is heated and compression molded using a high-pressure mold shaped precisely to fit the Yamaha Banshee intake and carburetor flanges. Reinforced internal sleeves may be embedded during this step for added strength and rigidity. -
Curing:
After molding, the boot undergoes a vulcanization (curing) process, where it is subjected to high temperatures. This process strengthens the rubber and locks in its flexibility, chemical resistance, and heat endurance. -
Trimming and Finishing:
Excess rubber is trimmed, and each piece is smoothed and inspected to ensure clean edges and consistent internal flow geometry. -
Quality Control:
The finished boot is pressure-tested for sealing integrity, dimensional accuracy, and overall durability under simulated engine conditions. -
OEM Certification:
Once approved, the product is labeled and packaged for OEM distribution, ensuring it’s a perfect fit for Yamaha Banshee YFZ350 models.
✅ How to Use the Intake Carburetor Joint Boot Insulator – Yamaha Banshee YFZ350
Step 1: Preparation
-
Ensure the engine is completely cool before starting work.
-
Disconnect the battery for safety.
-
Remove the carburetors and any intake manifold components blocking access to the old insulators.
Step 2: Remove Old Insulators
-
Carefully unbolt and remove the old intake boots from the cylinder.
-
Check for signs of damage, wear, or cracking.
-
Clean the mounting surfaces on the cylinder to remove old gasket material, debris, or oil residue.
Step 3: Install New Insulators
-
Align the new OEM intake boot insulator with the intake ports on the engine.
-
Insert any included gaskets or O-rings if required.
-
Secure it with OEM bolts or fasteners—tighten evenly to avoid leaks.
Step 4: Reattach Carburetors
-
Slide the carburetor throats into the new intake boots.
-
Ensure a snug, airtight fit.
-
Tighten the clamp rings around the boot to secure the carburetors firmly in place.
Step 5: Final Inspection
-
Double-check all connections for tightness.
-
Inspect for any air gaps, pinched hoses, or loose fittings.
-
Reconnect the battery and perform a test start to confirm proper installation.
🔧 Pro Tips:
-
Use a torque wrench to avoid over-tightening and damaging the boot.
-
Replace both boots at the same time for balanced airflow.
-
If reusing clamps or bolts, inspect for rust or wear.
Be the first to review “OEM Intake Carburetor Carb Joint Boot Insulator”
Related products

yamaha banshee parts
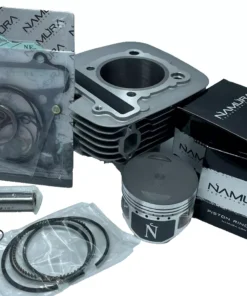
NAMURA PISTON, GASKET, CYLINDER JUG YAMAHA BIG BEAR 350 BRUIN 350 WOLVERINE 350

yamaha banshee parts

yamaha banshee parts
Genuine Yamaha Warrior 350 Big Bear Raptor 350 Cylinder Jug Namura Piston


yamaha banshee parts
Aluminum Billet Lock Up Clutch Cover For Yamaha Banshee 350 YFZ 350

yamaha banshee parts
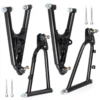
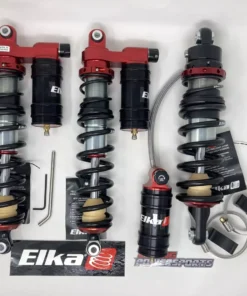
ELKA Suspension LEGACY SERIES FRONT & REAR Shocks YAMAHA BANSHEE 350

yamaha banshee parts


yamaha banshee parts

yamaha banshee parts
Yamaha Banshee 350 Atv Amazing Block Off Plate Made by Protech Design
Reviews
There are no reviews yet.